Tuesday, December 06, 2011

Lego Party

My house looks like a fabric shop exploded, got run over by a mack truck full of Christmas and then 3 kids and a baby ran through it.
And I'm happy.

November and December are tough months for us, because Mr. Chaos is in and out of town with the Nutcracker.
He's in Idaho this week.
I think.
I know he started the week driving up to Pullman, Washingtion.  
...
yup, I checked, the tour schedule says Idaho.


We also have 2 birthdays and Thanksgiving.

Hence the random silence on my part.

~ Today ~ 
I'm watching a friend's infant - 7 months old - part time while she goes to school.
So there's baby toys scattered around and bottles in my kitchen.

I was inspired by sophie to set up a bunch of tables and quilt last night, and didn't put anything away.

 and I began to decorate for Christmas.

IMG_4445

I got my window lights up!

~ Rewind ~
I threw two totally awesome parties for Jack and Tess.
A Rapunzel party and a Lego party.

Lego Party first.

Saturday was Jack's Lego party, which was a huge success.

I made a Lego cake and everything.

lego cake


Simplest Party ever.

I pushed all our furniture against the walls to make a big open space.

lego table

I bought two boxes of basic Legos and  20 mini-packs of individual figures, set them out on a table
- I didn't bother with a tablecloth - they're boys, they don't care.

I thought the runner was festive enough.

and wham -   added the boys.

They built stuff and ran around, like boys do.
(One of the dads stayed, with his two older kids - a high schooler and a middle schooler - all three of them were playing with the legos too.)

When arguments started to break out
(if you put 12 8-year-old boys in the same room, they WILL argue)
it was cake time.

I scheduled the party from 3-4:30, which meant I didn't need to feed everyone.
(tee-hee, super sneaky me!)

punch

They had cake, ice cream and fruit punch or apple juice.
Paper plates and cups  - no dishes to clean!

When that was done, we did presents.
They all sat remarkable well while Jack read every card out loud and opened everything.

IMG_4411

Then they ran around and played until the parents showed up
(which wasn't very long at all)

Perfect timing.

Score Mom.

The best part?
Once everyone left clean up was super simple.
No mess, no fuss.

The kids spent the rest of the day playing with the new toys.
Jack got lots of legos and graciously chose to share with his sisters.

~At our house there are no "mines" but when you get a new toy,
you don't have to share on your first day.
works like a charm.
The siblings learn to be patient, knowing that they'll get to try the new stuff tomorrow.~

They played for hours.

smiley jack

I didn't even make him wash his face until bedtime.
Feed him Hawaiian Punch and he gets a red mustache.
every time.

Now he's eight.  EIGHT!
when did that happen?


What happened to my 3-year-old?


Saturday, December 03, 2011

I Won the Block Lotto!

I won the Block Lotto for November!


Join me on the Block Lotto Blog


blocklotto.blogspot.com


I was so surprised.  
I had to read the list twice and then check the participants to make sure I was the only Kristin.
I almost didn't enter my blocks, 'cause I wanted to make something for me.
I'm so glad I did!
Whoo hoo!

BL 2011-11

I entered 5 blocks.
It was totally fun to use up the "what was I thinking" and "thank you for the wonderful gift"  fabrics.  Individually some of the fabrics are cringe worthy, but together they make a happy scrappiness.
The pattern and info are here.

These blocks are great because they are so scrappy.  Putting them together should be a breeze.  I won 37 blocks, and I made extras to bring the total to 42, which is a nice 6 block x 7 block layout.
I've decided I'm going to do it completely randomly, sewing them together, just making sure that there aren't two blocks with the same fabrics side by side.  I'm leaning towards a barn raising layout, but I'm not sure.

The pattern is on Bonnie Hunter's website, Quiltville, and she's got a couple different layouts pictured there.

That got me thinking about the other blocks I've made for the lotto.  

Looking Back...

I started playing the lotto in August of 2009.

BL 2009

I was new to quilting and totally stressed over each block making it perfect before I entered it.
The official 2009 Block Lotto archives are here.
(The archive has links to pattern info and what-not)
I made 39 blocks that year.


BL 2010

2010 was a year of improv-y wonky blocks, which I'm not a huge fan of.
I won in January. a set of 40 blocks.
Those totally awesome Tic-Tac-Toe blocks are waiting patiently.  I had a hard time coming up with a setting I liked, and then when I did I got busy, so they are still waiting.
I have a plan now.  It's nothing like what I originally was going to do.

I only was able to participate the first three months before life got in the way.  The word blocks were fun.  The rest of the year I looked at the blocks each month, but they didn't really strike my fancy enough for me to take time to make them.  

The 2010 archives are here.
I made 24 blocks that year.


BL 2011

This year the lotto was a mish-mash of patterns.
If sophie had a theme, I'm not sure what it was. 
The archives for the year are here.
I made 36 lotto blocks this year.

So, I've made a total of 99 blocks over 15 months, and won twice, a total of 77 blocks.
useless facts, I know.

It's been totally fun and I'm looking forward to next year.
It's been fun to play with all the different patterns and fabric combinations.

Thursday, December 01, 2011

I Hate Decisions! Help!

So, I'm building this quilt.
The top is done.
Yeah me!  

full top

But then I decided it needs a border....I think..

These are my three choices.

3 border choices

I can't decide which (if any) I should use!

corner with no border
No border

border option 1
Border 1 - this fabric isn't in the quilt anywhere, but it goes nicely with the other greens.

border option 2
border 2 - solid red

border option 3
or border 3 - leaves on cream

What would you choose?

Thursday, November 17, 2011

Friday Night Sew In


Handmade by Heidi
Are you ready?  Friday night will be pizza and a movie night here.  Hubby's out of town, so I'm gonna sew, sew sew.

I might even finish something!

Friday, November 04, 2011

Following The Leader - Quilt Pattern


FTL complete


I did it!  I designed a quilt, built it twice and wrote a pattern.
You might remember the above example from this post.  
Whew!
Writing a pattern is a ton of work!  
Please let me know if you find any errors.

Following the Leader


Following the Leader
Finish size: 48 ¾” x 48 ¾”
the directions assume you have basic sewing skills.
all seams are 1/4".


Materials
·          - Maze - 1 charm pack - OR - (35) 5" squares
·          - Background - 3 yards - OR -  2 ½ yds and a matching solid charm pack
·          - Geese and Binding - 1 1/4 yd  
·          - Backing – 3 yards 

Cut and Prep

ftl grey cut

I always label my pieces when I’m cutting out a whole quilt.  Otherwise I’d never remember what I cut.  I use either bits of paper pinned to the top piece or blank labels.

Maze Charms - 
You only need 35 charms.  The rest are extras.


Background Fabric -
Cut (8) 4"x WOF strips – sub-cut these strips into:
·         (28) 4"x 2 1/2" - label as "A"
·        (1) 4"x7  1/2" - label as "B"
·         (2) 4"x 36" - label as "C"
·         (2) 4"x 42 1/2" - label as "D"
·         (25) 4" squares - label as "bkgd sq"

Cut (2) 2 3/4" x WOF strips – sub-cut into:
·         (28) 2 3/4" sq - label as "goose corners"

Cut (6) 2 1/2"x WOF strips - label as "border"
DO NOT DO this next step if you’re using a solid charm pack.
Cut (8) 5"x WOF strips – sub-cut into
·         (35) 5" squares - label as "charms"    

If you’re using a solid charm pack, you only need 35 charms.

Goose and Binding Fabric - 
Cut (1) 5" x WOF – sub-cut into
·         (7) 4 3/4" sq. - label as "geese"
Cut (1) 18"x WOF - label as "binding"

Binding
Whenever possible I make the binding first.  I'm so impatient for the quilt to be done that I don't want to stop and take the binding when it's time to use it.  I'd rather have it ready to go.

I made bias binding, using this tutorial I found thru Tracey.
I cut my strips at 2 ½”.
Feel free to use whatever method works for you.

Building the Geese Units
These units use:
(28) Goose Corners
(7) Geese
(28) "A" rectangles

I found this method of building flying geese units from sophie.   Follow the directions there, using the "geese" and "goose corners".  The squares we've cut are slightly larger than the math in the directions calls for.  I like having a bit of wiggle room to square them up when I'm done.

You should end up with 28 flying geese.

Now we turn them into squares. 

IMG_3986

Sew an “A” piece to the bottom of the goose.
Make 18 of these.
I’m calling these Top Geese. (original, right?)

Sew an “A” piece to the tip of the goose.
Make 10 of these.
I’m calling these Bottom Geese

Square them all up to 4" and set aside.

Building the Maze Units

**These directions will not create the rainbow effect in my grey example, the maze will look more like the other example.**

I pressed my seams open, which eliminated a lot of bulk.  I also starched the crud out of them, so they stayed nice and square.  I made my own starch, using this recipe.

These go together quickly if you chain piece them. 

On the back of your maze charms draw a diagonal line, corner to corner.
This is a cutting line, so it won't be seen.
Just be sure to use a pen that doesn't bleed, I used a ball point pen.


ftl charms marked

Sew a maze charm and a solid charm together ¼” from the center line.
Run it thru the machine again, sewing a ¼” from the other side of the center line.
Cut on the center line.  Press.

You now have 70 Half Square Triangles.  Pull 12 of these.  Trim to 4”.  These are the "maze corners."  Set aside.

Pull 29 blocks.  On the back of each of these blocks, draw a diagonal line corner to corner, opposite the existing seam.

ftl second charms mark (2) 

Pair up each marked block with an unmarked one.
Following the steps above, sew ¼” seam on both sides of the line.

thl second seam sewn

Cut.  Press. Trim the blocks to 4".

ftl hourglass trimmed


Building the Borders
You can look at the layout drawing under "putting it all together", if these directions are confusing.
Inner Border:
For this step we need:
·         (1) Top Goose
·         (1) Bottom Goose
·         The “B” piece
·         (2)  “C” pieces
·         (2) “D” pieces

Sew the Bottom Goose to the left end of a “C” piece.  – This is your Top Border.

Sew the “B” piece to the tip of the Top Goose.  Sew the other “C” piece to the other end of the Top Goose. – This is your Left Border.

The Bottom and Right Borders are the “D” strips, no sewing required. 


Outer Border:
For this step we need:
·         (6) “border” strips.

Piece the strips together to create the lengths needed.  We need :
·         (2) 2 ½” x 46”
·         (2) 2 ½” x 50”


Putting it All Together
You should have:
·          58 maze blocks
12 maze corners
17 top geese
9 bottom geese
25 “bkgd sq”

Now the fun part.
Using the picture below, lay out your maze and geese.
When you're happy with the placement, snap a picture of the layout to use as a reference.

FTL-Layout
please ignore the itty-bitty numbers, they helped me make the rainbow effect.

Now, sew the blocks into rows.

Here's what I do, so I don’t get them mixed up as I sew the rows together.  

Stack the blocks in each row, with the left-most block on top.

IMG_3992

Clip the stack together AT THE TOP.
The clips I use leave a nice impression on the top of the block, which helps me keep them oriented correctly.

IMG_3994

Before you sew them together, place a pin in the upper left corner of the top block.

IMG_4012

Now, sew the blocks into rows.  Press.

Lay out the rows again to double check placement.
Sew the rows together.

Adding the Borders
Inner Border:
Sew the Top Border on first, then clockwise on the next three.  These pieces are slightly longer than you need.  You can trim of the extra after you attach it to the center.

Outer Border:
Sew the top and bottom borders on, then add the sides.


Quilt, Bind and Enjoy.

whew!  my first pattern.  what do you think?


Finish it up Friday

My finish for the week is very special to me, it is an original design by me, and I wrote a pattern for it.
I created the design for the Eugene Modern Quilt Guild's solids challenge.

I built a tester one this spring for my niece, before breaking into the charm pack I was given.

I was waiting until I had shown it at a meeting before blogging about it, but I have determined that I'm only going to be able to attend the meetings once in a blue moon, given the work/travel schedule of Mr. Chaos and the lessons/school schedule of my children.

So, wanna see?

Following the Leader

Following the Leader

it finishes at just under 49" square.

and I pieced the back -

IMG_4320

up close on the quilting...

IMG_4317

and I machine sewed the binding on.
I've been trying to figure out a way to make it look as nice as when I hand sew it, but I HATE hand sewing.

I think I like how it turned out.

machine stiched binding


IMG_4318

The pattern can be found here.

:)

Wednesday, November 02, 2011

Help! I Can't Decide!

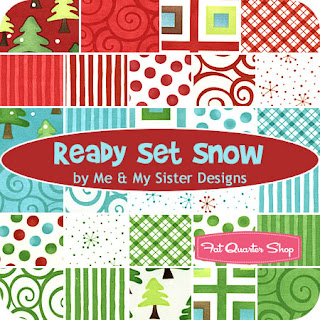
I just spent the last 2 hours browsing for fabric online.  Generally I start at Fat Quarter Shop and then see if I can beat the price elsewhere.  I like their pictures of the collections.

What was I shopping for?  I'm doing a totally wonderful trade with a knitting friend of mine, Maiya.
I'm making her an advent calendar and she's knitting a few gifts for me.

I hate picking fabric for other people!  What if they don't like it?

I've decided to use a charm pack, I figured that would give me the most variety at the least cost.

She asked for something fun and funky - she's got two little boys.  

Not a lot of options out there.


but her kids are afraid of sock monkeys.  don't laugh, mine are too.

After searching more I've narrowed it down....


which I love, but I'm not sure it's "fun" enough...


which I can't find in charm packs - I'd have to buy a layer cake... (oh darn)

and


What do you think?

Are there other fun and funky collections I've missed?

Friday, October 21, 2011

Finish It Up Friday!

Here's my finish for the week!

 folded

I FINALLY got Stella's quilt bound and washed.

This quilt's got quite a story.  Month's ago, Stella (my niece) who's 7, drew me a picture of a quilt she wanted.  Basically it was six squares with flowers in some of them.

Then, she came over and picked out one fabric from my stash that she wanted in her quilt.

Butterflies.

focus fabric

Then I pulled everything else and went to town.
Finding fabrics that went well with the butterfly fabric she chose was quite the chore.
Especially because i didn't want it to be overly pinky. (Yes, I'm aware the backing is pink.  It's just not overly pink.)

close

The design was something I came up with after messing around with mini dresdens in a runner.
There are a few things I'd do differently if I were to offer it at a pattern, which I might do, at some point.

I backed it using a great vintage sheet I scored at the Goodwill for $1.

backing

She and her mom are coming over tonight and she'll get to take it home!

full

I also finished up a UFO for her mom, too...

IMG_4259

...more on that tomorrow!

Tuesday, October 18, 2011

Choose Your Own Adventure – A Whole New World


The concept behind Choose Your Own Adventure (CYOA) is simple.
The directions are basic and easy, but depending on the choices you make with fabric and layout, the results are a project unique to you.  


All of these projects can be made using scraps or coordinated fabrics, it's up to you.


I hope this is the first in a series of tutorials.
I certainly had a good time playing around!


Without any further delay, here's the first one

A Whole New World

butterfly garden (3)
 This classic and easy block finishes at 4" is called "Whole New World".
(At least that's what I found when I googled it. I'm sure it has other names)

12 days scraps

Fabric Requirements


****Because this project is designed to use scraps, I've listed the cut size of the pieces we'll need, instead of the yardage needed****

Prints –
  • (36) 5" squares  (a charm pack)


    ~or~

  • (18) 4 7/8" squares, cut once on the diagonal to make 36 large triangles.
    ~and~
  • (36) 2 ½" squares.
Background –
  • (36)   2 7/8" squares, cut once on the diagonal, to make 72 small triangles.
~ If you're using yardage, you'll need the equivalent of (3) WOF strips.


Cutting
Prints - 
           If you are using 5" charms -   You are going to do the following to each:
  • Cut it along the diagonal.  Set aside one half.
cuton diagonal
  • Cut a 2 1/2" square out of the remaining half.  Set aside.
cut square

The two little triangles are extras, you can toss 'em or save them as you see fit.


                If you're not using charms -  everything is already cut. 


Building the Blocks
These blocks go together super quick if you chain piece them.
  • Sew a small background triangle to a square, press towards the triangle.
squares with one triangle

  • Sew a second triangle to the adjacent side of the square, making sure that you'll end up with a large triangle, not some sort of wonky shape.
sewig second trianglesewing second traingle

oops! 
oops!

  • Press towards the triangle.  Clip all the ears.
second triangle sewn]

Now, if you're going for a scrappy look, stack your pieced triangles and your large triangles next to each other and randomly sew them together, just making sure you don't sew matching ones together.

If you want them to be matchy-matchy take a moment to pair them all up.


My Autumn blocks are scrappy and my Christmas blocks are matchy-matchy.


  •  The large triangle is slightly larger than we need, so line up the diagonals on both pieces.  Sew along the diagonal.  Press towards the large triangle.

lining up
  • Trim the block down to 4 1/2" 
finished block


Now, the fun part! 
stack o blocks 

What layout do you want to use?


Here are just a few layout possibilities

layout 1    layout 2layout 3    layout 4layout 5

For my Autumn-y topper I used a sampler pack (2  1/2" sq) of Butterfly Garden and some remnants from the same fabric line I received as part of my 12 lb box of scraps.
My Christmas blocks are made with 12 Days of Christmas scraps from last year.


The backing and binding were also pieced from the scraps.

butterfly garden (2)    butterfly garden backing

I haven't completely decided what I'm going to do with my Christmasy ones....


Wouldn't it look totally wonderful as a color controlled pattern?  You can take a look at my Block Lotto Blocks for October for examples of color-controlled blocks.